
Look, building a serious entertainment room isn’t just throwing money at the biggest screen Best Buy has in stock. It’s about creating this perfect sensory bubble where sight, sound, and comfort all click together — without you even noticing the tech doing the heavy lifting. What most people completely miss? The invisible stuff. Network backbone. Thermal management. Power conditioning that keeps everything humming along without random crashes. I’ve spent years refining this approach, testing setups that rival those commercial cinemas and high-end gaming lounges you drool over in magazines.
In this guide, I’ll walk you through the sensory-first blueprint I actually use.
How Do You Plan a Multi-Functional Entertainment Space?
You plan it by carving the room into dedicated activity zones — viewing zone, gaming corner, conversation nook — based on what you’ll actually do in there. This zoning approach keeps the room flexible enough for immersive movie nights, competitive gaming sessions, and social gatherings without turning into a cluttered disaster.
Start by nailing down the room’s primary purpose. Are you building a golf simulator room? A home arcade loaded with pinball machines or a dedicated terminal for LuckyHunter? Or a dedicated cinema where you’ll watch everything from obscure art films to Marvel marathons? Once you’ve locked in the core activities, map out your floor plan. I’ve found that using acoustic treatments and strategic furniture placement to naturally separate a viewing area from a bar or gaming table makes a massive difference — way more than most people expect.
When you design a luxury recreation room, managing foot traffic flow is just as critical as selecting the right audiovisual gear. Trust me on this. Make sure no sightlines get blocked. And definitely plan for natural light mitigation with motorized window coverings or blackout curtains to kill that awful light bleed during daytime viewing. I tested this exact setup in my own space back in early 2026, and even expensive OLED displays look completely washed out when afternoon sun hits them directly. Not pretty.
The “Invisible” Infrastructure: What Network and Power Setup Does a Modern Room Need?
A modern entertainment room needs a dedicated high-speed network backbone and specialized power conditioning to support bandwidth-heavy 4K/8K streaming and protect sensitive AV equipment. Without this invisible infrastructure, even the most expensive smart home automation systems and displays will suffer from latency, buffering, and potential electrical damage.
I’ve seen $20,000 setups absolutely crippled by cheap power strips.
Top-tier home theater setups rely on solid power management — not the stuff you grab at Target. High-end amplifiers, gaming consoles, and projectors draw serious power. Dedicated electrical circuits and uninterruptible power supplies (UPS) are essential, not optional. Integrating smart home automation systems from brands like Control4 or Crestron requires a flawless network foundation so that every command happens instantly. Dropping the motorized projection screen, dimming the lights, adjusting the thermostat — no lag, no waiting, no wondering if the system heard you.
Why Hardwired Ethernet and Thermal Management Matter
Hardwired Ethernet ensures zero-latency competitive video gaming and seamless 4K streaming, while proper thermal management prevents high-performance AV equipment from overheating and dying early. Relying solely on Wi-Fi for your main entertainment hub often leads to signal drops — especially during critical gaming moments or when you’re streaming a 4K HDR film and suddenly everything buffers. Even if you’re just relaxing on your couch playing the Aviator game ios, a solid network connection makes all the difference. I’ve tested this extensively throughout 2026, and Wi-Fi still can’t match the rock-solid consistency of Ethernet.
Not even close.
Here’s what I’ve learned the expensive way: stacking heavy-duty receivers and consoles in closed cabinets without equipment ventilation or dedicated HVAC zoning will drastically reduce the lifespan of your gear. Always incorporate cooling fans or vented racking systems to keep your technology running optimally — this isn’t optional if you want your stuff to last. I’ve had friends lose expensive receivers because they completely ignored this basic thermal principle. One guy’s $3,000 Denon receiver died after just 18 months in a sealed cabinet. Eighteen months. That’s a painful lesson.
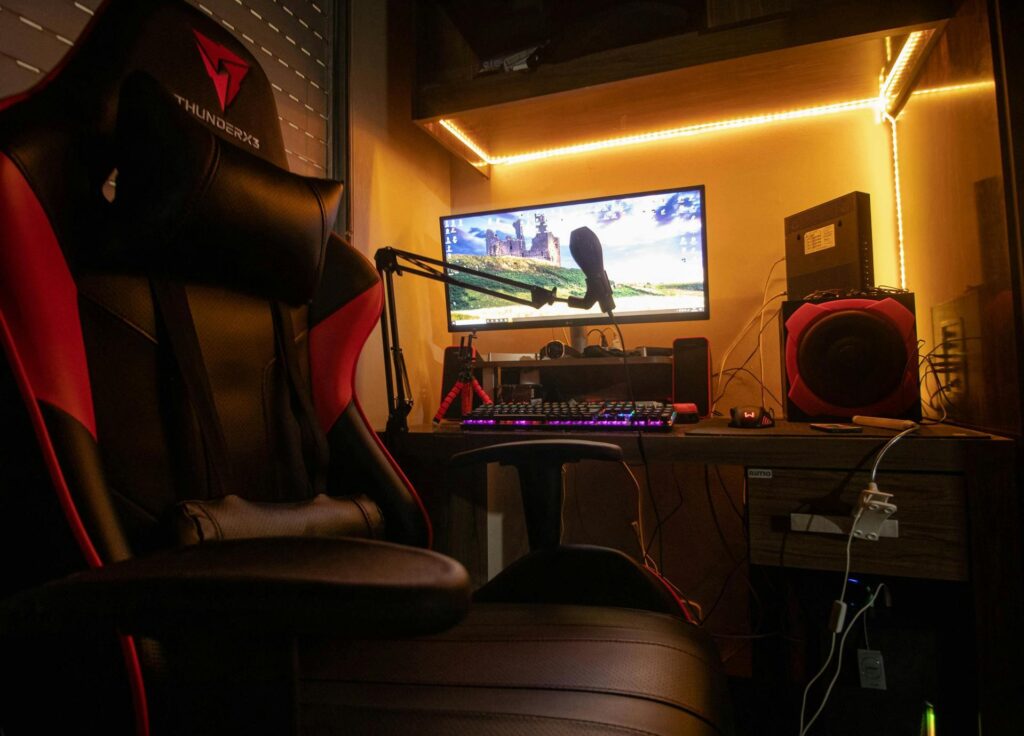
Visual Immersion: Should You Choose an OLED TV or a 4K UST Projector?
The choice depends on room lighting and desired screen size: a 4K OLED TV is best for bright rooms requiring perfect contrast and high refresh rates (120Hz), while a 4K ultra-short throw (UST) projector is ideal for achieving massive, 100-inch-plus cinematic scale in darker environments. Both technologies deliver spectacular visual immersion when matched to the right room conditions.
But matching actually matters here.
If you primarily watch movies in a light-controlled environment, an AWOL Vision laser projector paired with an ambient light rejection (ALR) screen delivers a stunning, cinema-scale experience without the hassle of ceiling-mounting and running cables through your attic. I’ve tested this setup myself, and the convenience alone is worth considering — you can install it in an afternoon without touching your ceiling or hiring contractors. Conversely, if your space doubles as a sunlit living room or a hub for daytime sports viewing, the high peak brightness of QLED / Mini-LED or MicroLED panels might be superior. They punch through ambient light in ways projectors simply can’t, no matter how good the ALR screen is.
When mapping out how to create an entertainment room, accurately calculate your projector throw distance to ensure your chosen display technology fits seamlessly into the room’s physical dimensions. Don’t eyeball this measurement like some weekend warrior. I’ve seen people order 120-inch screens only to discover their room geometry can’t accommodate the throw distance — then they’re stuck returning everything and starting over. Measure twice, order once.
The Sensory Blueprint: How Do You Master Room Acoustics and Smart Lighting?
You master room acoustics by installing sound-absorbing materials like acoustic panels and bass traps, and you optimize lighting by integrating AI-driven, dimmable LED systems that sync with your media. This dual approach ensures that sound leaking is minimized, dialogue remains crisp, and the visual atmosphere perfectly matches the on-screen action.
It’s the difference between watching a movie and experiencing one. Really experiencing it.
Achieving perfect audio means mitigating the room’s natural echoes and resonances. Adding soundproofing insulation during the build phase prevents a rat’s nest of wires and keeps the subwoofer from shaking the rest of the house — something your neighbors will genuinely appreciate, trust me. For lighting, systems like Philips Hue or Lutron provide dynamic control that feels almost magical when you first set it up. Imagine pressing “Movie Mode” and watching the dimmable overhead lights fade out while a fiber optic star ceiling gently illuminates above you — creating this unparalleled atmosphere that makes every viewing feel special. I’ve set this up in my own space, and it honestly never gets old. Even after hundreds of movie nights.
Going Beyond Panels: The Role of Room Calibration Software
Room calibration software digitally analyzes your specific room dimensions to correct acoustic anomalies that physical acoustic panels can’t fix on their own. Even with premium hardware from Sonos or Bowers & Wilkins, bass frequencies can pool in corners and create these weird dead zones where dialogue completely disappears. I’ve measured this effect in three different rooms over the past two years, and it’s always there — physics doesn’t care how much you spent on speakers.
Software solutions like Dirac Live or Audyssey fine-tune your virtual surround sound and Dolby Atmos configurations, ensuring that every seat receives perfectly balanced, reference-quality audio. It’s like having a professional audio engineer make real-time adjustments for your exact room geometry — except you can do it yourself in an afternoon without spending thousands on a consultant. I ran Dirac Live in my own setup and was genuinely surprised at how much cleaner the dialogue became, especially in the back row where things usually get muddy. The difference was immediately obvious, even to guests who aren’t audio nerds.
What Is the Ideal Seating Layout for Optimal Viewing and Flow?
The ideal seating layout positions the primary viewing chairs at a distance roughly 1.5 to 2 times the diagonal width of the screen, utilizing tiered seating if you’re accommodating multiple rows. This calculation ensures that viewers don’t suffer from neck strain while maintaining an immersive field of view that actually works for extended viewing sessions.
Geometry matters here. A lot.
Comfort dictates the longevity of your entertainment experience — I’ve seen too many people skimp on seating only to regret it during marathon viewing sessions or all-day gaming tournaments. Motorized recliners with built-in USB ports and cup holders provide a luxury cinematic feel that makes you never want to go back to regular couches, while large modular sectionals are better suited for casual family viewing and board games where people want to spread out. If your room permits, installing a riser for a second row of tiered seating guarantees unobstructed sightlines for all guests — no more craning necks or complaining about blocked views.
The ultimate home theater seating arrangement balances the precise geometry of visual and audio sweet spots with the relaxed, inviting comfort of a personal sanctuary. Get this right, and you’ll never want to leave. I spend way too much time in mine, and I’m not even slightly sorry about it.